Pumps
This chapter will discuss the pressurization of water in more detail, the two main pump designs that are used to do this, parts of the intensifier pump and troubleshooting of leaks in the intensifier pump. Transport and metering of abrasive will also be covered.
Courses
High pressure waterjet cutting
Water is pressurized to very high pressures, in excess of 50,000 psi. This pressurization is accomplished with the use of pumps of various designs, discussed next in this chapter.
The high pressure water is transported through a series of stainless steel tubes to a cutting head. Depending upon the material being cut, the cutting head can be either a “pure water cutting head” or an “abrasive cutting head.”
In the cutting head, the high pressure water is forced through a small diameter orifice. The diameter of this orifice is anywhere from 0.004″ to 0.020″. This step converts the pressure of the waterjet stream into speed. We go from potential energy to kinetic energy. Coming out of the orifice, the waterjet stream is moving at 2200 mph or faster. Higher pressure results in higher speed. Smaller diameter orifices yield a faster waterjet stream, but also a stream with less kinetic energy since there is not as much water available to accelerate abrasive grains to full speed.
In a pure water cutting head, the water immediately exits the cutting head after passing through the orifice. The speed and power of the waterjet stream is enough to cut soft or thin materials like foam, rubber, soft wood, plastics, carpet, food, car headliners, circuit boards and more.
In an abrasive cutting head, a very hard abrasive, typically garnet, is fed into the waterjet stream. The abrasive particles are accelerated to near the speed of the waterjet stream. This gives the abrasive particles much power. The abrasive waterjet stream now travels down through an abrasive nozzle, or mixing tube, approximately 3 inches long with an inner diameter of between .030″ and 0.050″. The mixture of water and abrasive exits the abrasive nozzle and will cut hard materials like metals, stone, acrylic, ceramic, composites, phenolics and porcelain.
A CNC control will move the cutting head in up to 6 axes of motion to cut the targeted work piece.
Types of pumps
Intensifier
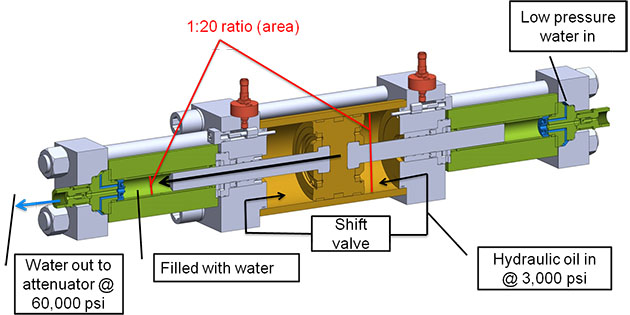
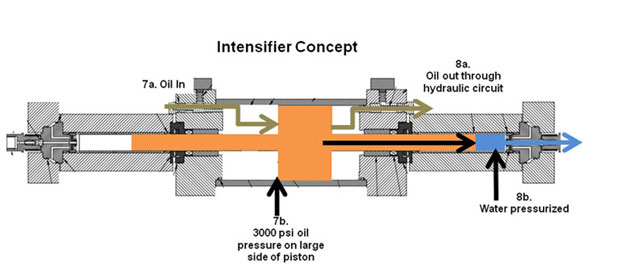
Intensifier pumps are called intensifiers because they use the concept of pressure intensification or amplification to generate the desired water pressure.
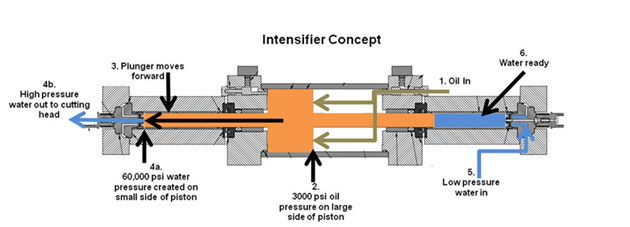
If you apply pressure to one side of a cylinder and the other side of the cylinder is the same surface area, the pressure on the other side will be the same. If the surface area of the smaller side is half, then the pressure on that side will be doubled. Generally with intensifier pumps there is a 20 times difference between the large surface area (where the oil pressure is applied) and the small surface area (where the water pressure is generated). The following picture shows this concept.
Ultimately, there must be a restriction in the flow of water in order for the pressure to be generated. This restriction is generated by the orifice in the cutting head. Pressure is maintained until the orifice diameter exceeds the limits for water output of the pump.
For very small diameter orifices, in order to maintain pressure, the pump only needs to cycle very slowly to maintain pressure. As the orifice gets larger, the pump must work faster to maintain pressure and water flow. If the orifice gets too large, the pump tries to cycle too fast for the design specification. An “over stroke” situation is sensed by the control and the pump is stopped with an error message.
If there are leaks in the water circuit between the pump and the cutting head, this can also result in a pump “over stroke” situation. The leaks effectively rob water available to go to the cutting head. The same as putting in too large of an orifice, the pump runs faster to maintain pressure until it reaches its limit.
Typically, intensifiers stroke at around 50 – 60 strokes per minute when working at full capacity.
The pressurization process
- Oil is forced into the right half of the hydraulic cylinder.
- The piston-plunger assembly moves to the left. Oil is displaced out of the left half of the hydraulic cylinder and the water in the left high pressure cylinder is pressurized.
- The plunger moves to the left.
- Once pressure has begun to build, the high pressure water is forced out of the intensifier through the center of the check valve.
- While the piston-plunger assembly is moving to the left, it is also allowing fresh water to flow into the right high pressure cylinder through the inlet holes of the check valve.
- When the plunger-piston assembly has reached the end of its stroke to the left, the right high pressure cylinder is now full of water.
- The directional control valve receives a signal via a proximity sensor near the piston to reverse the flow of hydraulic oil. Oil is now forced into the left half of the hydraulic cylinder and the piston moves to the right.
- Oil is displaced out of the right half of the hydraulic cylinder while the water in the right high pressure cylinder is pressurized by the right plunger.
Direct Drive
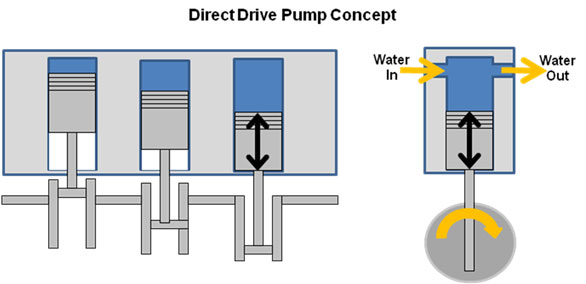
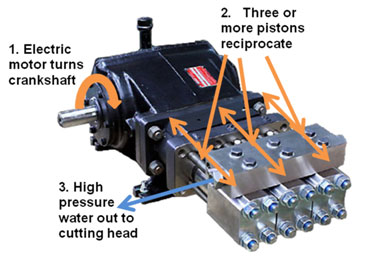
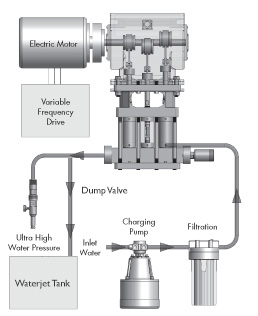
A direct drive pump works like a car’s engine. A motor turns a crankshaft attached to 3 or more offset pistons. As the crankshaft turns, the pistons reciprocate in their respective cylinders, creating pressure in the water. Pressure and flow rate are determined by how fast the motor turns the crankshaft.
Direct drive pumps cycle much faster than intensifiers, on the order of 1750 revolutions per minute. Direct drive pumps generally are found in lower pressure applications (i.e. 55,000 pounds per square inch and under). Maintenance on the direct drive pump tends to take longer than an intensifier pump. Direct drive pumps can only run more than one cutting head only if all cutting heads are cutting the same part at the same time. With an intensifier pump, you could have cutting heads on multiple machines, cutting different parts, cycling the various cutting heads on and off in any sequence. The intensifier pump will need to only vary its stroke rate accordingly to maintain flow and pressure.
Generating High Pressure Water: Direct Drive Pumps
- 3 plungers directly coupled to a crank shaft
- Pressure and flow rate are determined by how fast the motor turns the crankshaft
- Crank shaft cycles at up to 1750 rpm
- Minimal pressure spikes (no attenuator needed)
- Generally found in lower pressure applications
- Cutting water is always running while the pump is on. The water either goes through the cutting head, or, when not cutting, through the dump valve into the waterjet tank.
Disadvantages
- Complex – Many moving parts
- Time consuming to maintain
- Able to support additional cutting heads ONLY when the heads are cutting the same part (Pump is always pressurized)
- Expensive
Advantages
- High efficiency
- Low pressure fluctuations
- No attenuator
Parts of the intensifier pump
1. Electric motor and hydraulic pump
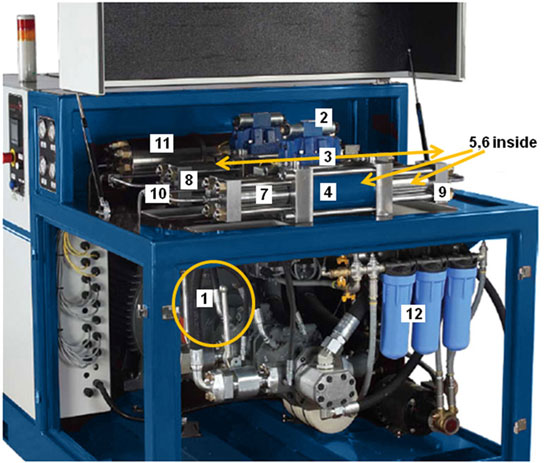
The electric motor and hydraulic pump (number 1 in picture above) create the oil pressure needed for the oil side of the intensifier. This assembly is normally in the lower portion of the pump cabinet. The electric motor and pump are rated in HP (or kW for metric). Typical pump sizes are 30 HP, 50 HP, 75 HP, 100 HP and 150 HP As discussed in the previous chapter, each pump will have an associated water output volume (gallons per minute) and pressure (psi).
Again it is important to remember that HP is not necessarily an indication of pressure. A 150 HP pump doesn’t necessarily create more pressure than a 50 HP pump. Horsepower is more directly related to water output, since more HP will be needed to create enough power to move the piston/plunger assembly in the intensifier at the required stroke rate.
2. Directional control valves
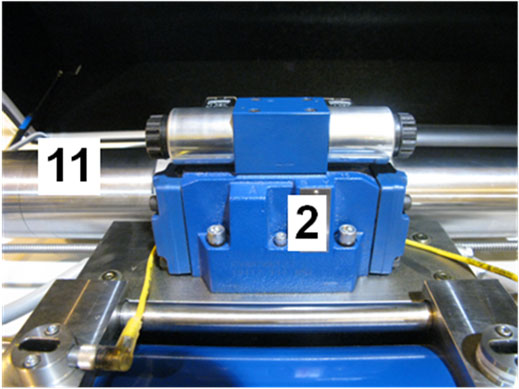
The directional control valve (2 in Figures 2 and 3) controls the direction of flow of the hydraulic oil to and from the intensifier.
3. Intensifier
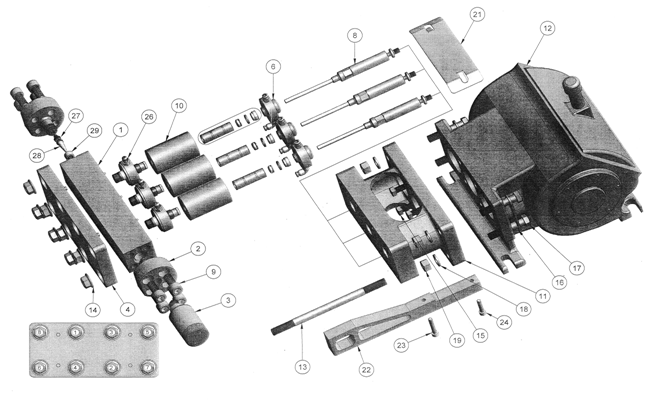
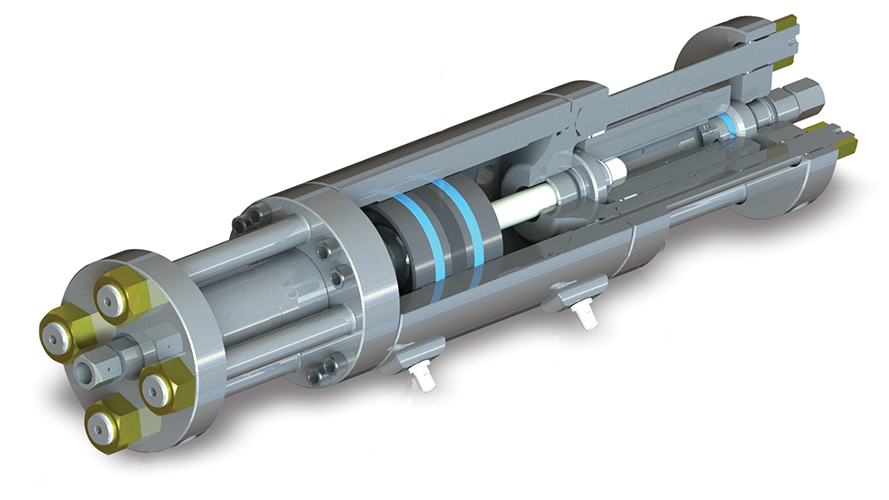
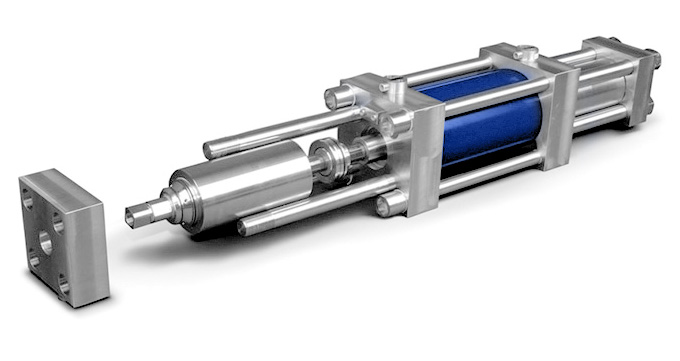
The intensifier proper (3 in Figures 4 and 2) consists of the hydraulic cylinder (4), high pressure cylinders (7), and check valves (8) and end caps (9). Not visible from the outside are the piston and plunger.
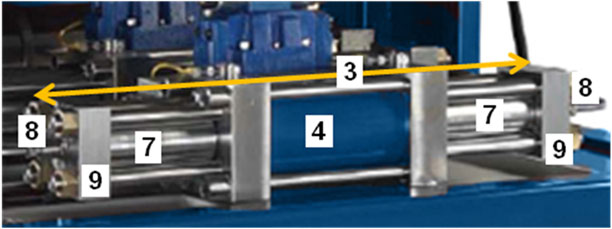
4. Hydraulic cylinder
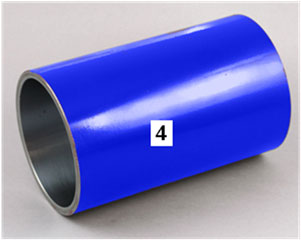
The hydraulic cylinder (4 in Figures 2 and 5) houses the piston and is the area where the hydraulic oil does its work. The directional control valves control the flow of oil into and out of each side of the hydraulic cylinder.
At each end of the hydraulic cylinder is an end plate that is used to connect the hydraulic cylinder to the high pressure cylinder. The two end plates for the hydraulic cylinder are connected and pulled tightly in place with 4 tie rods and bolts.
5. Piston
The piston (number 5 in Figures 2 and 6) is the larger diameter cylindrical part located within the hydraulic cylinder (4 in Figures 2 and 5). The piston effectively splits the hydraulic cylinder into a left side and a right side. Oil cannot pass from one side to the other past the piston. It must exit and enter the hydraulic cylinder through the hoses attached to the directional control valve. The hydraulic oil pressure is exerted onto either side of the piston in an alternating fashion so that a back-and-forth movement of the piston and plunger assembly is generated.
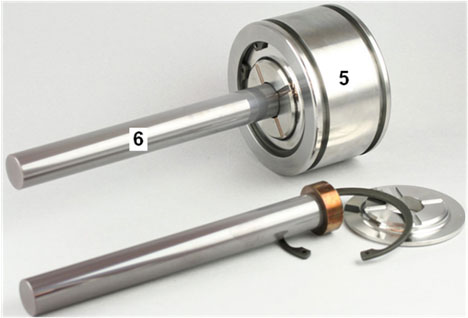
Figure 6 - Piston (5) and plunger (6) assembly
6. Plunger
The plungers (6 in Figure 7) are the two smaller diameter shafts that are connected to each side of the piston. The attachment point is inside of the hydraulic cylinder. The other ends of the plungers extend into the left and right high pressure cylinders. Seals are placed around the plunger shaft to keep oil from seeping into the water side of the pump, and vice versa. The plungers are made out of either stainless steel, or, more recently, ceramic. Ceramic is used because of its ability to handle heat and high pressure with little thermal expansion.
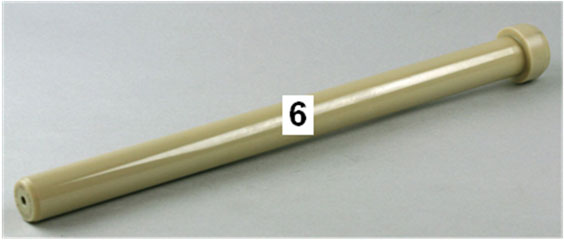
Figure 7 - Ceramic plunger
7. High pressure cylinder
The two high pressure cylinders (7 in Figures 8 and 2) are where the water is pressurized. They are usually referred to as “left hand side” and “right hand side.” The high pressure cylinders are machined out of very thick stainless steel and treated in order to withstand the extreme pressures they are put under on a continual, cyclical basis.

8. Check valve
There is one check valve (number 8 in Figures 10 and 8) at the end of each high pressure cylinder at the end opposite from the hydraulic cylinder. The check valve allows fresh water to enter the high pressure cylinder and high pressure water to exit the intensifier. The check valve is designed to only let water flow in one direction. Fresh water comes in though channels machined in the sides and exits through one or more holes in the face of the valve. Various seals, poppets and springs are used to maintain this water flow. Over several hundred hours these components will wear, allowing pressurized water to flow out the water inlet path, or allowing pressurized water to seep back into the high pressure cylinder. The symptoms and diagnosis of these various situations will be discussed later in the “Maintenance” chapter.
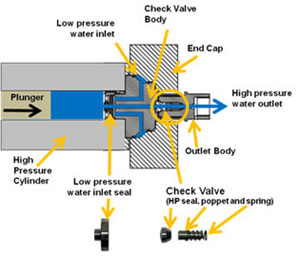
Figure 9 - Check Valve Body cross-section
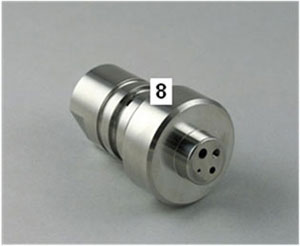
Figure 10 - Check Valve Body
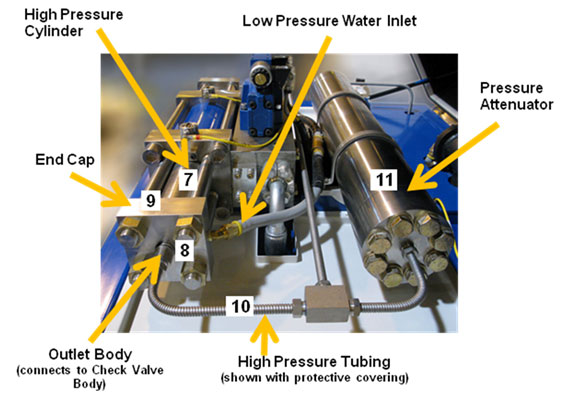
Figure 11 - View of upper portion of intensifier cabinet
End Cap
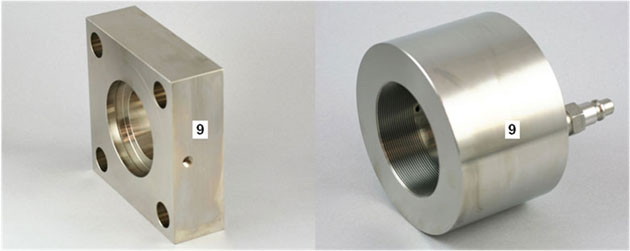
The end cap (number 9 in Figures 11 and 2) is either a cylindrical or square item. The cylindrical version screws onto the output end of the high pressure cylinder. The square type is held in place with tie rods and bolts. The end cap has a hole in the center for the check valve and outlet body. It will also have a connection point for the incoming fresh water. The water flows through holes machined through the cap to line up with inlet holes in the check valve.
10. High pressure tubing
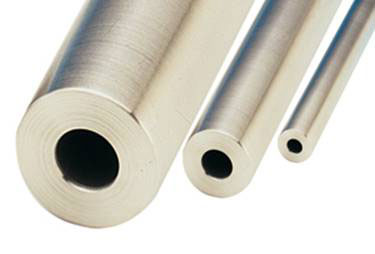
High pressure 304 or 316 stainless steel tubing (number 10 in Figure 11) is attached to the outlet of each check valve. Common outer diameters are 0.25″, 0.313″, 0.375″ and 0.563″. Inner diameters range from 0.062″ to 0.312″. There is usually a flexible protective covering around the tube.
The high pressure tubing from the left hand high pressure cylinder will join together at some point with the high pressure tubing from the right hand cylinder. The high pressure tubing carries the pressurized water to the pressure attenuator. Additional high pressure tubing will channel the high pressure water to the cutting head.
The length, number of bends and other obstructions to flow (e.g. hand valves) in the high pressure tubing path must be taken into consideration when designing a high pressure waterjet system. Pressure will drop with each bend in the tubing. Also, as the distance between the pump and the cutting head increases, internal friction of the water as it drags against the inner walls will generate heat resulting in a loss of water pressure. This topic will be discussed in more detail in the Chapter 5 “Pressure Drop in Tubing.”
11. Pressure attenuator
The pressure attenuator (number 11 in Figures 13 and 2) smoothes out variations in pressure after the high pressure water has exited the intensifier. With each reversal of cycle of the intensifier, there is a slight delay in the increase of water pressure in the opposite high pressure cylinder. This delay is due to: 1) reversal of motion where instantaneous velocity at the end of the stroke equals zero, and 2) mechanical delays of reversal. All of these factors can result in a drop in water pressure. Some manufacturers do use proprietary technology to reduce this pressure drop, which we suggest you investigate when selecting a pump. Generally, if a 50 HP pump can sustain a 0.014″ orifice at 60,000 psi continuous operating pressure, the implication is that this hydraulic pressure drop challenge will have been addressed.
The pressure attenuator (number 11 in Figures 13 and 2) smoothes out variations in pressure after the high pressure water has exited the intensifier. With each reversal of cycle of the intensifier, there is a slight delay in the increase of water pressure in the opposite high pressure cylinder. This delay is due to: 1) reversal of motion where instantaneous velocity at the end of the stroke equals zero, and 2) mechanical delays of reversal. All of these factors can result in a drop in water pressure. Some manufacturers do use proprietary technology to reduce this pressure drop, which we suggest you investigate when selecting a pump. Generally, if a 50 HP pump can sustain a 0.014″ orifice at 60,000 psi continuous operating pressure, the implication is that this hydraulic pressure drop challenge will have been addressed.
Figure 14 shows the pressure fluctuations in the high pressure water line prior to the pressure accumulator. This shows a pressure change from high to low of almost 22,000 psi. So, for a 60,000 psi system, the high pressure water would be going from 60,000 psi to 40,000 psi after every stroke of the intensifier.
If this pressure fluctuation were not smoothed out by the pressure attenuator, cutting results at the work piece would be undesirable. There would be a significant line in the part with every stroke of the intensifier. Recall that any change in pressure results in a change in speed of the waterjet stream at the cutting head. This change in speed changes the speed at which the abrasive particles are moving and, therefore, the amount of force they will impart on the work piece. Lower pressure leads to less speed of the water which leads to less force of the abrasive which leads to slower cutting, or rougher edge quality.
Fortunately the pressure attenuator smoothes out these pressure spikes so that the water at the cutting head maintains a steady pressure, speed and cutting power.

Figure 13 - Pressure Attenuator
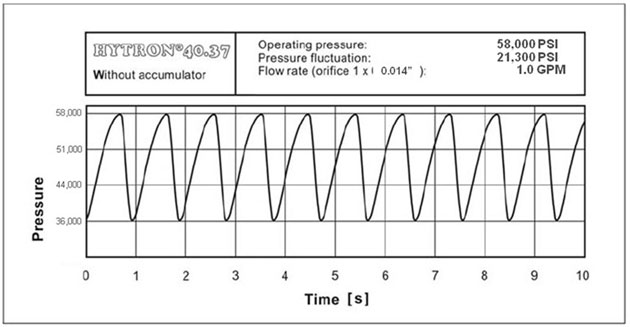
Figure 14 - Pressure fluctuation prior to accumulator
Source: "Pressure and Flow Rate Fluctuations at High Pressure Intensifier Pumps", F. Trieb, et.al., 2007 American WJTA Conference and Expo
12. Inlet water
Prior to entering the pump cabinet, water may have to be treated to get the water within the waterjet manufacturer’s specifications. Within the pump cabinet, usually in the lower portion, the water will typically go through one or more final filters just prior to entering the intensifier (number 12 in Figures 15 and 2).
The inlet water must be able to maintain a specified flow rate and pressure to ensure that the intensifier receives enough water. Incoming water must also meet certain requirements with respect to Total Dissolved Solids (TDS), pH, organic matter, temperature, etc. Poor water quality will result in drastically reduced high pressure component life (i.e. anything the high pressure water comes in contact with). Different pump manufacturers require different inlet water pressures, with some needing as little as 30 psi, and others mandating a water pressure booster pump to maintain 100 psi. Water quality will be discussed in more detail in the chapter 4 “Water Quality.”
Figure 15 - Inlet water filters
13. Controls and PLC
The controls and PLC (not pictured) control the valves in the hydraulic circuit to determine the pressure and flow of the hydraulic oil to and from the intensifier. Various sensor and proximity switches can also be integrated into the controls to monitor the entire pump to verify things like stroke rate, oil temperature and pressure, inlet water pressure and flow rate and more. This capability makes working with and troubleshooting the modern day intensifier much easier.
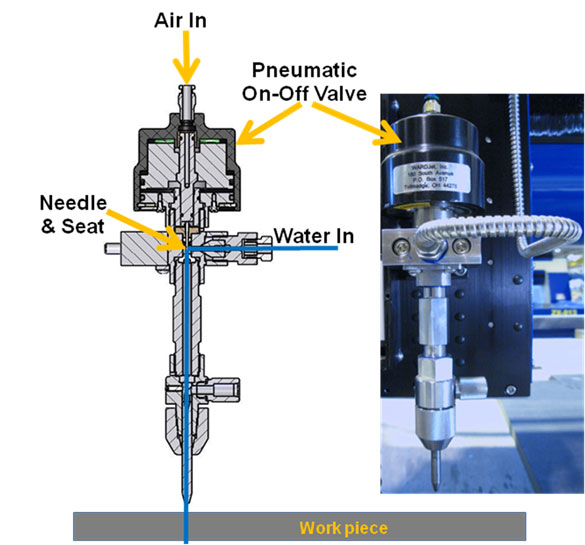
The pneumatic On-Off valve controls the flow of water to the cutting head. The On-Off valve at the cutting is “normally closed.” That is, when there is no compressed air supplied to the On-Off valve, a needle fits tightly against a seat to stop any high pressure water from getting to the cutting head. When compressed air is supplied to the On-Off valve (i.e. “tool on” command from the control), the needle is forced up from its seating location and the high pressure water can flow through the orifice to the cutting head.
In, or near, the high pressure pump cabinet is another On-Off valve that works in tandem with the On-Off valve at the cutting head. The On-Off valve in the pump is typically called the Safety Relief valve. This Safety Relief valve in the pump is “normally open.” This valve will stay open when there is no air supplied to it. When the On-Off valve at the cutting head closes (“tool off” command by control or no power to the system), the Safety Relief valve in the pump will open, relieving all water pressure from the high pressure tubing. When the “tool on” command is issued by the control, the Safety Relief valve closes so that all high pressure water will go to the cutting head. Note, not all manufacturers of new pumps have the Safety Relief valve as standard. We strongly suggest you ask your pump manufacturer if they supply this standard, and when it is activated. Again, some pump manufacturers will only activate the Safety Valve when an E-Stop is pressed; when the pump stops, high pressure lines are still pressurized.
Both of these On-Off valves must be in good working order to protect against accidental high pressure water discharge at the cutting head that could severely injure someone working on or near the cutting head or any of the high pressure lines. Periodic replacement of the needle, seat and associated parts is required to maintain these valves.
Abrasive feeding system
Pressurized Bulk hopper
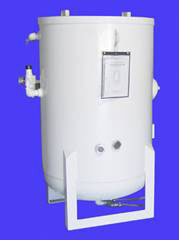
Abrasive is transported via tubing and pressure from a large bulk hopper located near the waterjet cutting system to a mini-hopper near the cutting head. Bulk hoppers will normally hold anywhere from several hundred pounds of abrasive to 2200 pounds. If you are cutting with one head and 1.4 pounds per minute of abrasive, then you are consuming about 84 pounds per hour. An 1100 pound hopper would last about 13 hours of operation. This would mean that the machine could run for well over a shift before it needed to be refilled. Most waterjets are provided with approximately 600 pound hoppers, which would equate to about 7 hours of operation. So, at least once during an 8 hour shift the hopper would need to be reloaded. The costs associated with the additional downtime over the course of a year should be evaluated.
Mini Hopper
A mini-hopper is typically mounted near and above the cutting head. Most of these mini-hoppers allow for a gravity feed of abrasive down to the cutting head. Many mini-hoppers control the amount of abrasive that can go down to the cutting head with the use of a slide with different size holes in it. The operator can change the position of the slide to change the amount of abrasive to the cutting head.
A recent advance in technology is remote CNC-control of the amount of abrasive released from the mini-hopper. Having this capability allows for optimum feeding of abrasive to the cutting head in relation to the water pressure at the pump for the following desirable capabilities:
- Piercing of fragile materials like glass or stone. Typically a lower water pressure will be used with a smaller amount of abrasive
- Changing abrasive amount for different abrasive nozzle sizes to optimize part cost. This can be done automatically if the mini hopper is set up to do this.

Summary
In this chapter, after a brief review of the waterjet cutting process, we looked at the two different style pumps that are used in high pressure waterjet cutting: intensifier and direct drive and covered a few of the advantages of each pump style. The water pressurization process of an intensifier pump was detailed. We went through the different parts of an intensifier pump so that you will have a good idea what a sales person or technician is talking about when they refer to a part in a pump. We also discussed the On-Off valve and how it is used at the cutting head and in the pump. The abrasive feeding system was discussed, as well as the merits of a CNC-controlled abrasive metering system.
Get in touch
Product Brochures
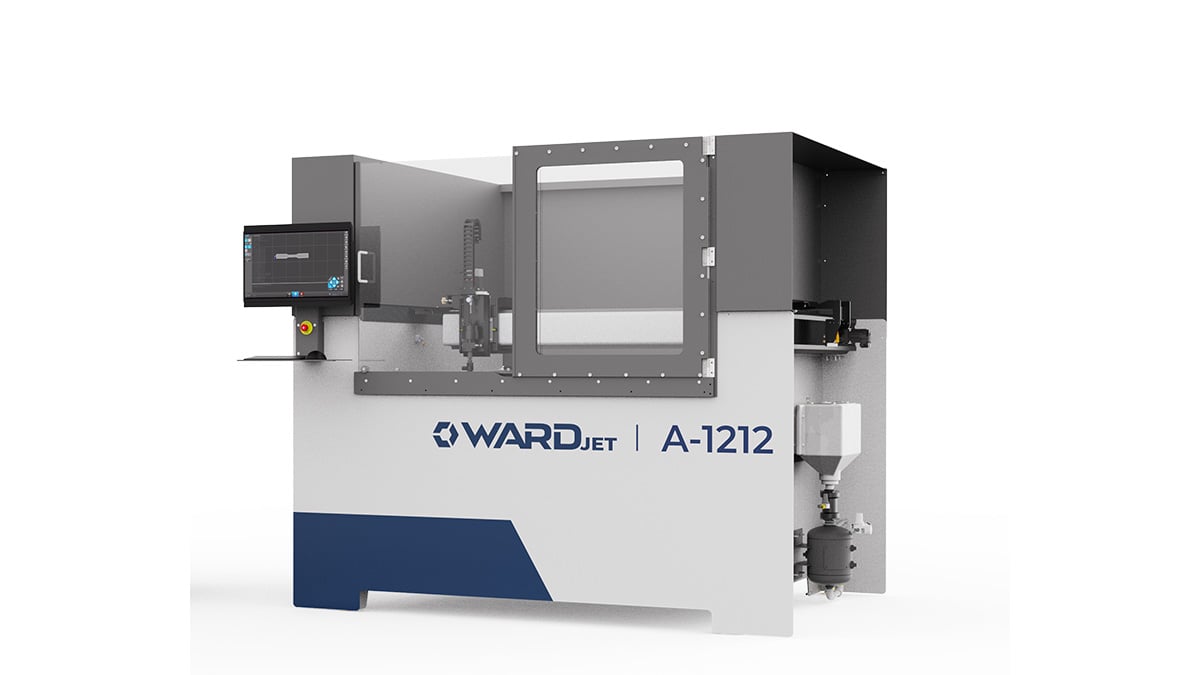
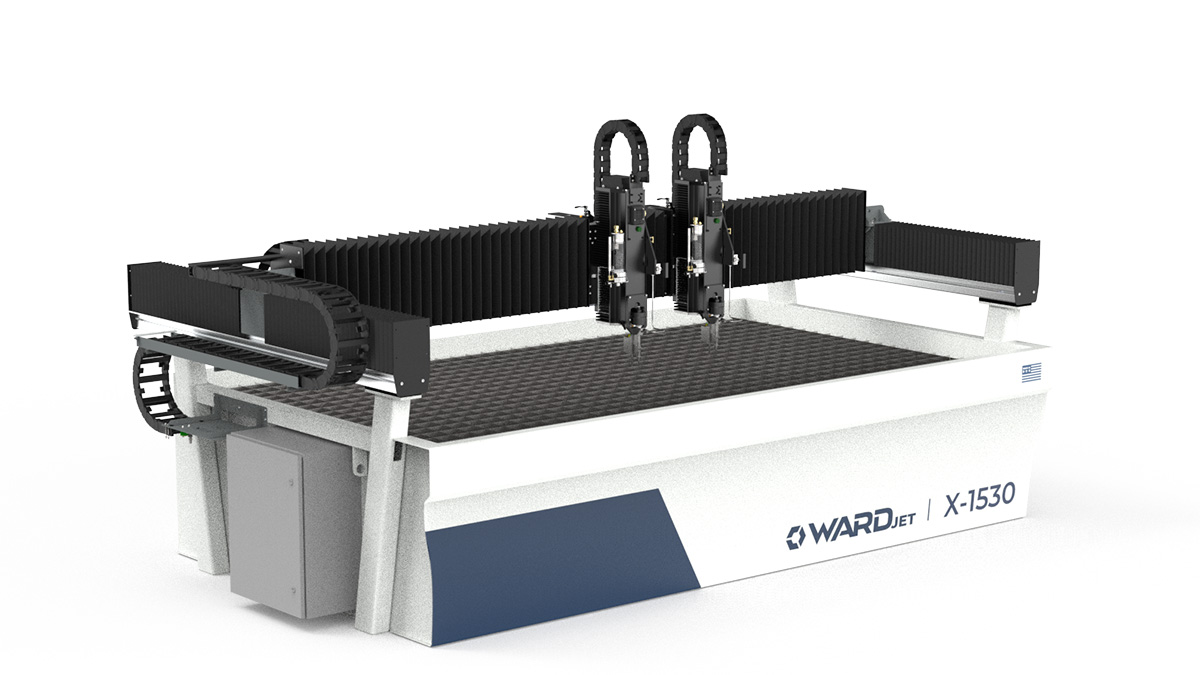
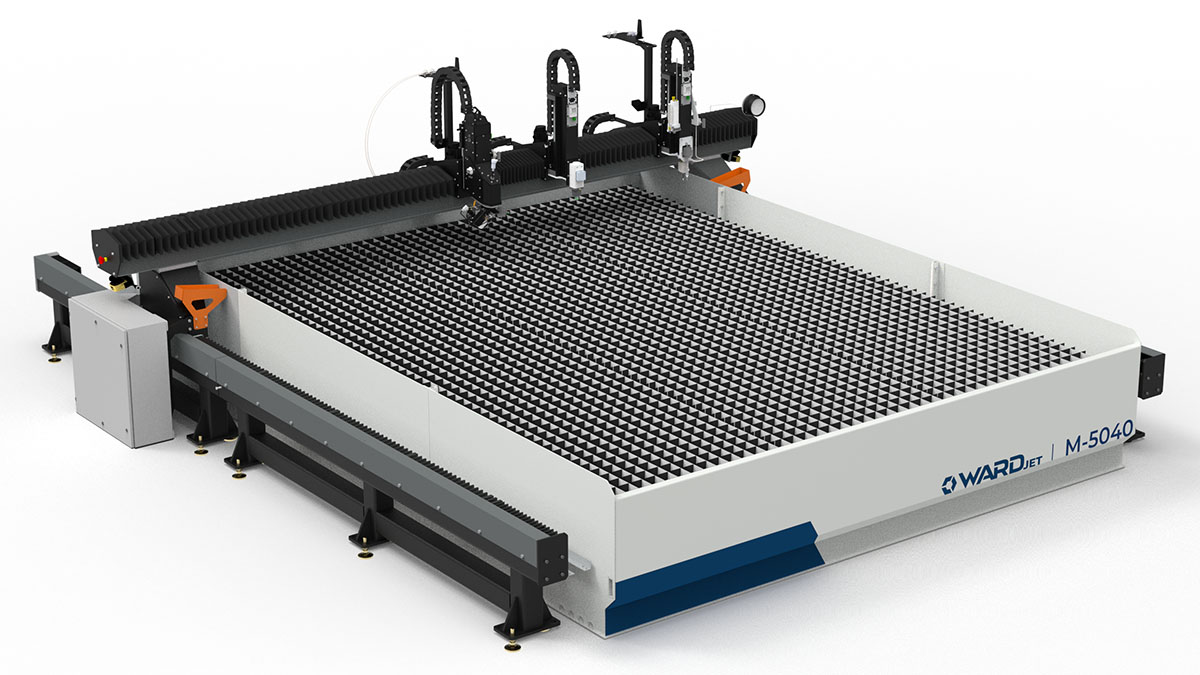
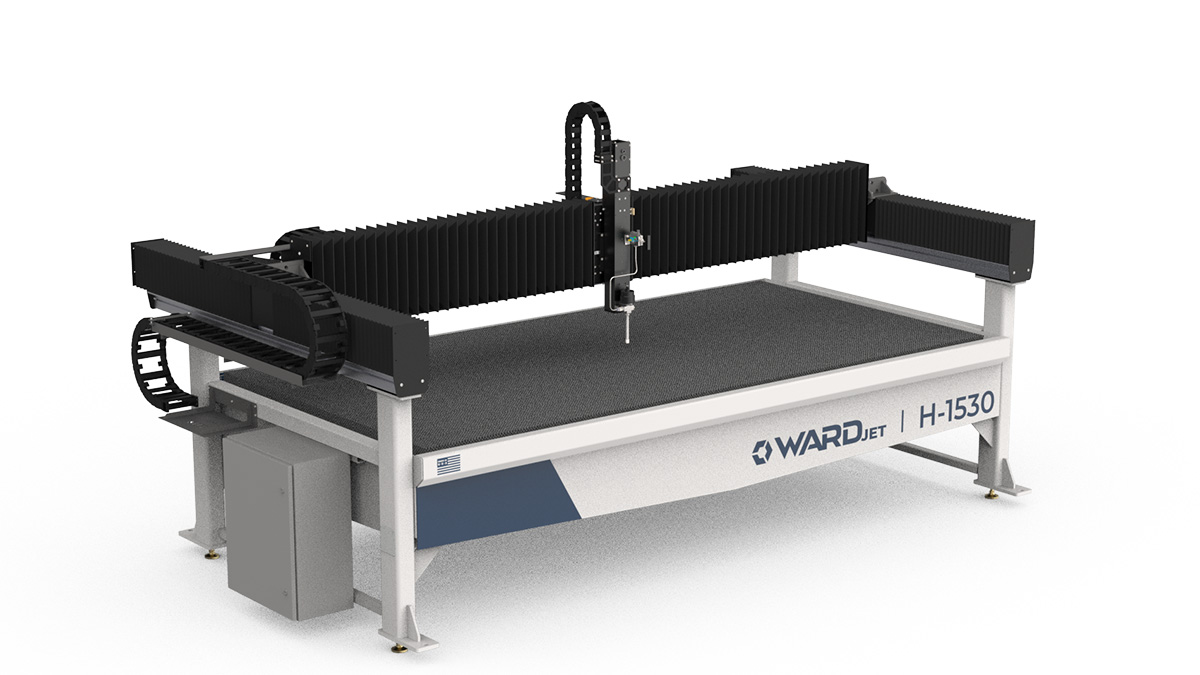
Get a copy of WARDJET's latest product brochure. Learn all about our extensive range of WARDJet CNC waterjets. Choose between our 6 big series - A-Series, X-Series, M-Series, H-Series, J-Series, and L-Series.

